Whether you’re a small business or a blogger, once you build a website you’ll want to know how much traffic you’re getting. This can help you better plan your marketing strategy, determine which of your web copy and call to action items are most successful, or convince companies to advertise on your site.
Even if you don’t know how you might use this data in the future, it’s a good idea to start tracking your site visits immediately upon building a website, or as soon as you can afterwards. That way you can start monitoring changes over time and see how much your site traffic grows along with your business.
Although there are lots of services that will allow you to track some of your site data, we at DevPress think the best, and most comprehensive, solution for the average website will be Google Analytics, a free data collection tool from Google. It can be modified to track pretty much any activity on a site, including page clicks, button clicks, and time spent on a page, and the great thing is, once you’ve set it up, it’s completely invisible to your visitors.
Below, we’ll following steps will explain how to create a new account with Google Analytics and connect it to your WordPress site. These instructions include links to a couple of popular plugins for WordPress that make connecting Google Analytics to your website a snap!
To start with, you’ll need a Google Analytics account.
1) Go to Google Analytics and log in with your Google (or your Gmail) account.
2) Click on “Access Google Analytics” in the top right corner:

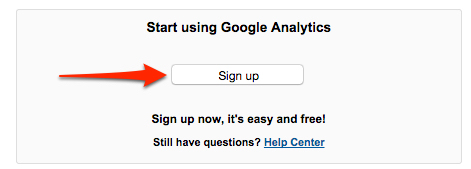
3) Sign up for Google Analytics. You will need to click on the button as follows:

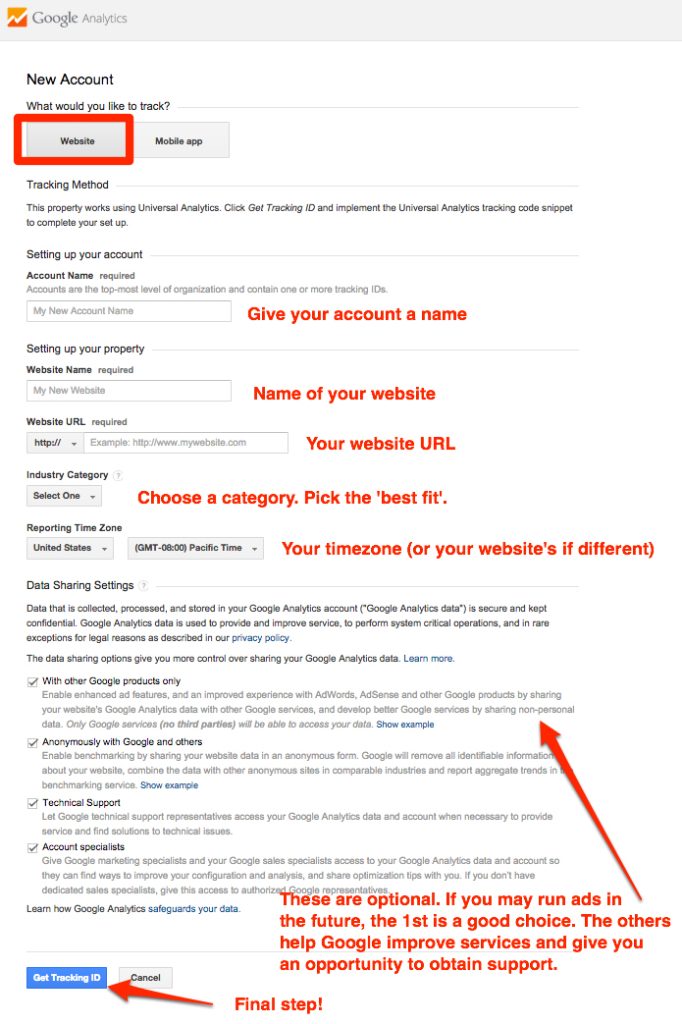
4) Fill out the New Account information.
Note that a single Google Analytics account can be used for a number of websites (each having its own “property”), so when you’re creating an account, choose your business name or your own name, rather than the website name.
Below, we’ve explained what each field is for to make it easier for you:

After agreeing to the Google Terms of Service, you will be sent to your new account’s GA Admin page. If you want to visit this page in the future, you might bookmark https://www.google.com/analytics/web/ .
5) Copy the Tracking ID (a code beginning with UA-). For most WordPress sites, you can disregard the tracking code snippet below the ID.
For example:
![]()
6) Install and activate a Google Analytics plugin.
Two plugins that we recommend to connect GA to your WordPress site (you only need one):
- Google Analyticator (offers a handy snapshot of site traffic in your WordPress Dashboard, and connects directly to your Google account)
- Google Analytics for WordPress by Yoast (built by Yoast, the same guy who created the excellent SEO plugin.)
7) Almost there! Enter your Tracking ID (or connect with Google through the plugin) as explained within the plugin instructions.
Once you have connected your site to Google Analytics, Google will start magically collecting site data, and will store it for when you’re ready to view it.
8) Next steps and how to learn more
While Google Analytics will start collecting data immediately, it will take time before there’s enough to be meaningful or show any patterns, so give it a couple of months before trying to dig into it too deeply.
To learn more about all of Google Analytics features in the meantime, Google offers an entire (free!) online training course on Google Analytics, which is a great way to learn more about this powerful tool. They also have some great video tutorials.

I often visit your website and have noticed that you don’t update it often.
More frequent updates will give your blog higher rank & authority in google.
I know that writing articles takes a lot of time, but you can always help
yourself with miftolo’s tools which will shorten the time of creating an article to a
few seconds.